
How do I import bank transactions manually for a client?
If you need to upload bank transactions manually (for example, when a client isn't connected via open banking), you can do this directly within Prosaic. Follow the steps below.
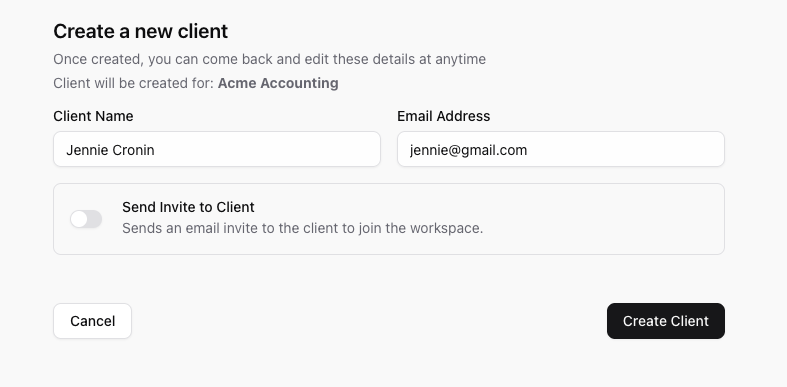
1. Add a Client
Before you can import any transactions, you'll need to create a client.
You don't need to invite them or send any emails, simply add the client so Prosaic can link bank accounts correctly.
2. Create an Entity for This Client
Next, create a new entity (e.g. Sole Trader, Rental Property, Trust) and save it.
Make sure you save the entity first by clicking 'create entity'
3. Link the Client to the Entity
Once the entity is created, add the client to it.
As soon as the client is linked, you'll see the option to Import Bank Transactions.

Why You Need a Client First
Prosaic uses open banking standards to manage bank connections.
Even with manual imports, every bank account must still be associated with a client.
That's why adding a client first is required before the “Import bank transactions” option becomes available.
4. A Manual Bank Account Is Automatically Created
When you import transactions for the first time, Prosaic will automatically create a Manual bank account for that client.
You can upload files into this account at any time. See CSV File Format below for the columns Prosaic expects, and a sample file you can download.
CSV File Format
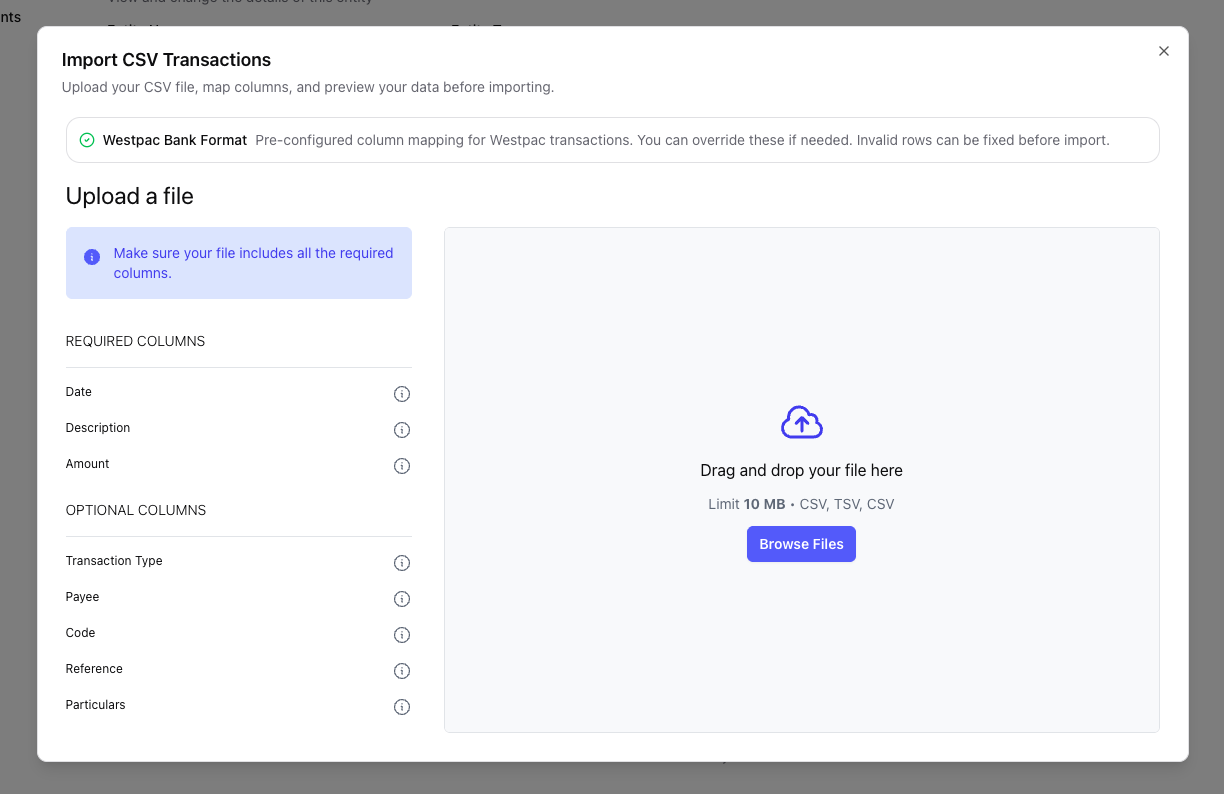
Prosaic recognises Kiwibank, Westpac, ANZ, ASB and BNZ exports and suggests a column mapping automatically, though you can always adjust it. Choose Other to map your own columns from scratch. Whichever route you take, every row needs to supply the same three pieces of information: a date, a description and an amount.
Required columns
- Date: when the transaction happened.
- Description: the transaction narrative (merchant, payer, or bank memo).
- Amount: a single signed value. Money in is positive, money out is negative.
Optional columns
- Transaction Type: a debit/credit code, if your bank keeps direction separate from the amount. See below.
- Payee: the other party on the transaction.
- Code, Reference, Particulars: the extra narrative fields some NZ banks (BNZ, Kiwibank) split their description into.
Any column you don't map is simply ignored, and any of these five can be left out of your CSV entirely.
Date format
Prosaic reads dates day first, the New Zealand convention, so 03/04/2025 is read as 3 April, not 4 March. Accepted formats are:
- DD/MM/YYYY or DD-MM-YYYY (e.g. 31/03/2025)
- YYYY-MM-DD or YYYY/MM/DD (e.g. 2025-03-31)
- DD MMM YYYY (e.g. 31 Mar 2025)
- Two-digit years, e.g. 31/03/25, assumed to be 20XX
Watch for ambiguous dates. A US-style MM/DD/YYYY export will fail outright for any day past the 12th, but for the 1st–12th it will silently import on the wrong date (03/04/2025 becomes 3 April, not 4 March). Check a few rows against the original statement before confirming the mapping.
Debits and credits in one Amount column
Most NZ bank exports put debits and credits in a single Amount column, with money out shown as negative or in brackets: -47.15 or (47.15) for a $47.15 payment, and 1415.66 for money in. Amount also accepts a leading $ and thousands commas, e.g. $1,234.56 .
Some exports, ANZ credit card statements are a common example, leave Amount unsigned instead and record direction in a separate column, usually headed Type or Dr/Cr. Map that column to Transaction Type and Prosaic applies the sign for you:
| Transaction Type value | Treated as |
|---|---|
| C, CR, CREDIT | Money in (positive) |
| D, DR, DEBIT | Money out (negative) |
If your Amount column is already signed, leave Transaction Type unmapped, it isn't needed.
Transactions of exactly $0.00 can't be imported, since there's no debit or credit direction to reconcile against. Remove them from your CSV before uploading.
Sample CSV
Download a template with every column filled in, delete whichever columns you don't need, then replace the sample rows with your own transactions:
Download sample-bank-transactions.csv
File limits
- Maximum file size: 10MB
- Maximum 20,000 transactions per import, split larger files into batches if you go over
5. After Import, Select Bank Account and Save Entity
This last step is important, make sure to select the bank account, to assign it to the entity and click 'save', which will begin the process of analysing bank transactions
6. Importing Statements to Existing Bank Accounts
After a bank account has been created by manual import, you can import statements to it again in future. Select the dots next to the bank account and choose import.

Deleting Bank Statements
You can review imported bank transactions for any entity by clicking on 'Bank Accounts' and the bank account name
If you need to delete statement lines or imported statements, use the trash icons on this screen
Future Improvements
We're working on more intuitive ways to add bank accounts, including better options for handling manual accounts, without needing to create or link a client first.